Have questions? Check out our Frequently Asked Questions (FAQ).
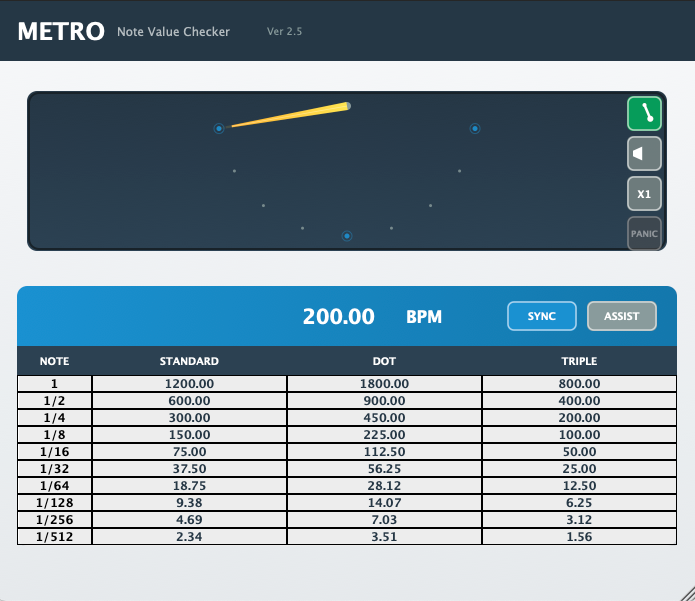
METRO PLUGIN
- Insert on a track. (Logic requires stereo)
- For Pro Tools, insert Click II before METRO in the chain.
- Verify BPM sync with your session in SYNC mode.
- Display the ASSIST table as needed.
- Select the required note value using the meter as a guide.
- Click the value in the table you need. (Automatically copied to clipboard)
- Paste into the corresponding parameter of your effect plugin.
- Switch to LUXURY mode to change the display as you like.
Determine effect timing based on note values, supporting recognition and input.
You can find the optimal start points and sweet spots for various effects while exploring your personal best settings!
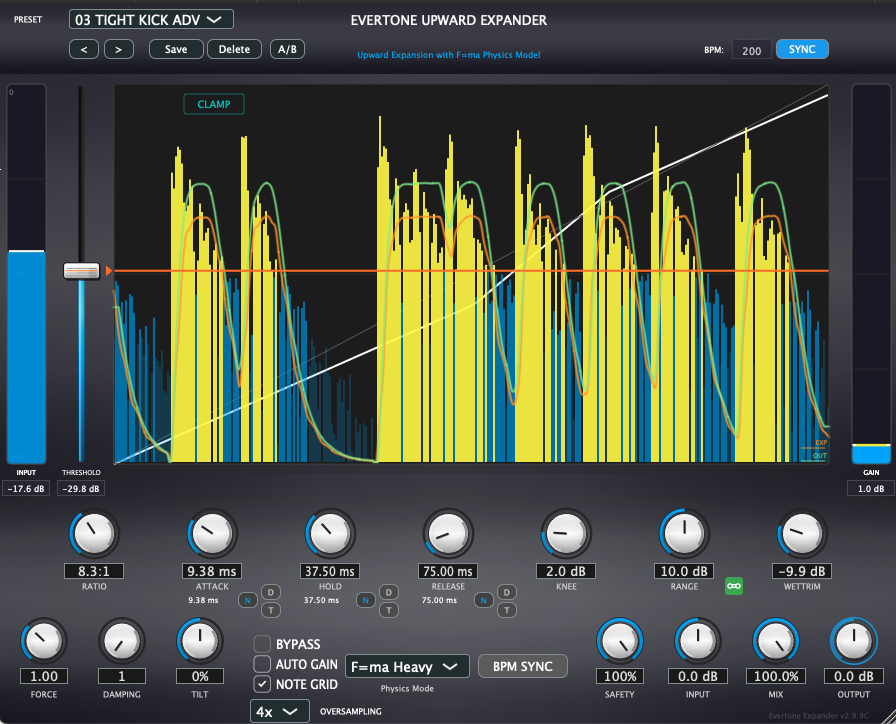
EVERTONE EXPANDER
- Insert on the track you want to process.
- First slot in the insert chain is the basic position.
- Heavy mode is recommended for easily hearing the effect of the physics engine.
- When using plugins that generate low frequencies, insert EXPANDER after them.
- Press the ASSIST button and apply NORMAL (for natural single processing) or ADVANCED (for blending with compression afterward or achieving a tight sound).
- When selecting presets with "ADV" in the name, select the preset first, then apply ADVANCED from ASSIST.
- Use INT AUTO while playing the track to set the optimal starting point.
- Check the effect while watching the waveform display, then use AUTO GAIN to adjust levels when satisfied.
It's also effective to click the waveform display window to pause and carefully observe the blend situation, how the effect is applied, and the increase in dynamics.
- Use RANGE link and other parameters according to your preference, and utilize AUTO GAIN for level adjustment.
- In the final MIX stage, actively use the FORCE value - think of it as increasing the "Newtons" of force pushing the speakers.
⭐ If You Get Lost
Set RANGE between 5-12 based on "how much dynamics you want to add," then press "INT AUTO" while playing the track.
Then compare NORMAL and ADVANCED.
Simply incorporate it into your existing mix flow for dramatic workflow improvement.
Using DRY/WET as a supplement to create a more powerful sound is also highly effective!
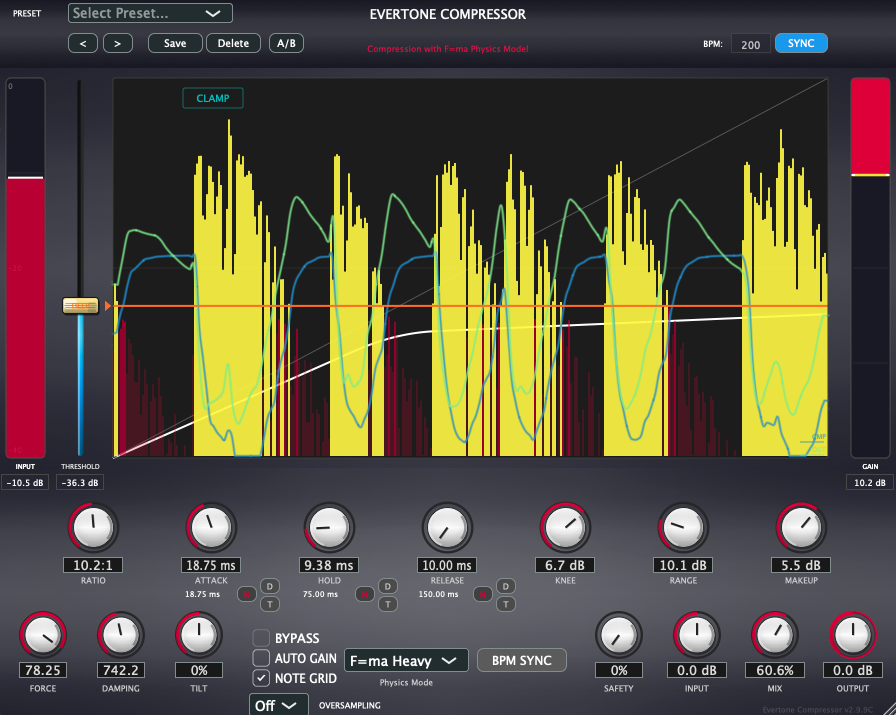
EVERTONE COMPRESSOR
- Insert on the track you want to process.
- Insert position should be after the expander.
- Heavy mode is recommended for easily hearing the effect of the physics engine.
- Press the ASSIST button and apply NORMAL (for natural single processing) or ADVANCED (for blending with compression afterward or achieving a tight sound).
- When selecting presets with "ADV" in the name, select the preset first, then apply ADVANCED from ASSIST.
- Check the effect while watching the waveform display, then use AUTO GAIN to adjust levels when satisfied.
- Actively use DRY/WET with the MIX knob, adjust parameters to your preference, and utilize AUTO GAIN for level adjustment.
It's also effective to click the waveform display window to pause and carefully observe the blend situation.
- When sound designing, actively use FORCE and DAMPING values (characteristics become more pronounced with dramatic settings, HOLD at zero, and minimum Release).
⭐ If You Get Lost
Set RANGE between 8-20 based on "how hard you want to slam," then press "INT AUTO" while playing the track.
Then compare NORMAL and ADVANCED. Or try setting HOLD to zero and RELEASE to minimum.
Slam towards the peak. Natural yet aggressive feeling.
A massive comp that delivers the feeling of a muscle monster slamming a basketball with full force - natural yet powerful depending on your settings!
For more questions, please check our FAQ (Frequently Asked Questions).